

The Secret to Perfectly Blooming Orchids: A Complete Guide to Planting and Care from Beginner to Expert
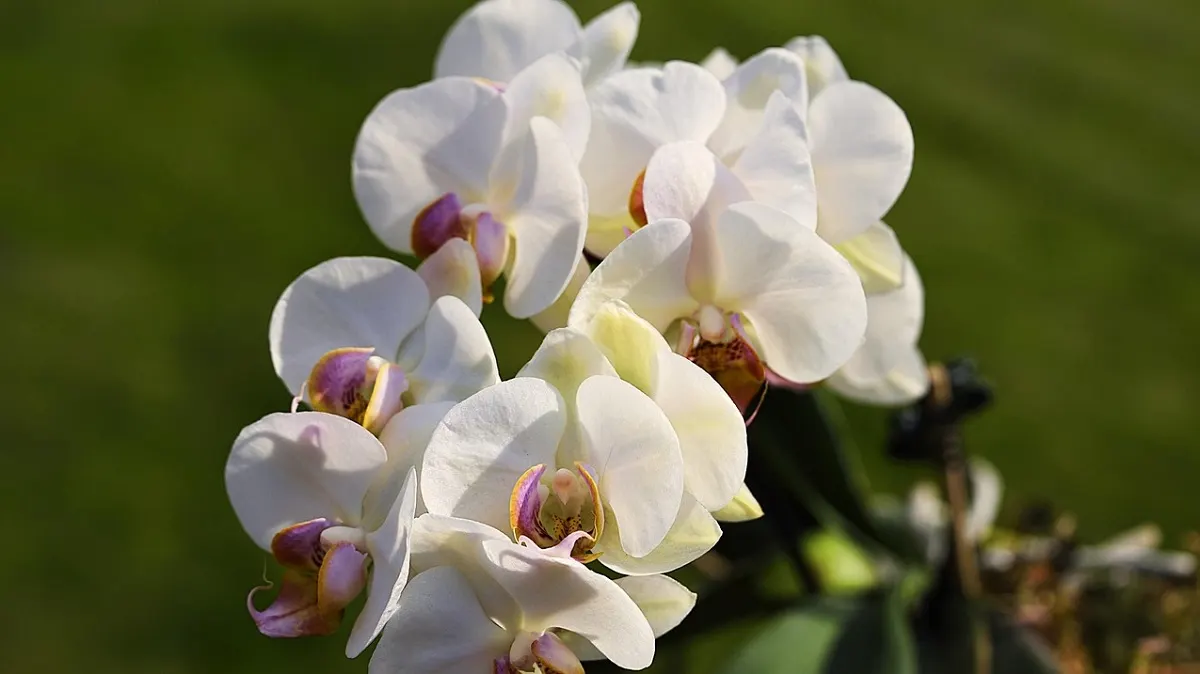
A comprehensive guide to growing orchids, covering everything from selecting types, planting media, watering, fertilizing, to solutions for common problems like orchids not blooming or root rot. This article also discusses practical daily tips for caring for orchids to keep them healthy and blooming beautifully.
BERITATOP - Orchids, with the captivating beauty of their petals and stunning variety of shapes, have long been a favorite among ornamental plant enthusiasts. Their charm lies not only in their exotic flowers but also in the mystery of their care, which is often perceived as difficult. Many feel they fail at growing orchids, when in fact, the key is understanding their specific needs.
This article will thoroughly explore the secrets behind healthy, blooming orchids. We will guide you, from beginner to expert, to uncover the main tips, common problem roots, and practical daily solutions. Prepare to change your perception of orchids and make them the crown of your garden.
Choosing the Right Orchid Type: The First Step to Success
Before embarking on your orchid-growing adventure, it's important to choose a type that suits your environment and experience level. Not all orchids are the same; each has unique preferences regarding climate and care.
Some orchid types are known to be more tolerant and suitable for beginners. Starting with these varieties will increase your chances of success.
- Phalaenopsis (Moth Orchid): This is the most popular orchid and recommended for beginners. Its care is relatively easy, its flowers are long-lasting, and it comes in a variety of colors and sizes. Moth orchids prefer indirect light and warm temperatures.
- Dendrobium: This type is also quite popular and relatively easy to care for. Dendrobiums have a wide variation in flower shapes and colors. Some species require a cool period to trigger blooming, while others prefer a stable climate.
- Vanda: Vanda orchids are known for their free-hanging roots and large, striking flowers. Their care is a bit more challenging as they require high humidity and frequent watering, but the results are very satisfying.
Also consider the climate in your location. High-altitude orchids like Cymbidium require cooler temperatures, while low-altitude orchids like Phalaenopsis and Vanda prefer warm temperatures. Choosing an orchid that matches your local climate is the first key to success.
Keys to Successful Orchid Growing: The Foundation of Optimal Care
After choosing your orchid type, the next step is to understand the foundation of its care. This includes the growing medium, pot, light requirements, watering, humidity, and fertilization. Each of these elements is interconnected and essential for healthy orchid growth.
Ideal Growing Medium
Epiphytic orchids (which grow attached to trees in nature) do not grow in soil. They require a growing medium that provides excellent drainage, optimal aeration, and the ability to retain sufficient moisture. The wrong medium is one of the main causes of failure.
Some common growing medium options include:
- Pine Bark: Excellent for drainage and aeration, but tends to dry out quickly. Suitable for orchids that prefer the medium to dry out between waterings.
- Charcoal: Provides good drainage and is stable. Charcoal also has antifungal properties and helps neutralize pH.
- Chopped Fern Fiber: Provides balanced moisture and aeration, but can decompose faster.
- Coconut Coir/Chips: Good at retaining moisture, but be sure to rinse it first to remove excess salt.
- Sphagnum Moss: Excellent at retaining water, suitable for young orchids or those that require high humidity. However, be careful with overwatering.
A combination of several mediums often yields the best results. For example, a mix of pine bark and charcoal for drainage, with a little coconut coir or sphagnum moss to retain moisture. Ensure the medium is always clean and sterile before use.
Suitable Pot
Pot selection is also very important. Orchid pots usually have plenty of drainage holes and often also holes on the sides for additional aeration.
- Clear Plastic Pots: Allow you to monitor root condition and medium moisture. Ideal for Phalaenopsis.
- Clay (Terracotta) Pots: Porous, thus helping water evaporation and keeping the medium cool. However, the medium will dry out faster.
- Wire/Plastic Baskets: Excellent for aeration and drainage, suitable for orchids like Vanda whose roots like open air.
Choose a pot size that fits the orchid's root system. Don't use a pot that is too large, as it will retain too much moisture, which can lead to root rot. Repotting should only be done when the orchid truly outgrows its pot or the medium has decomposed.
Sunlight Requirements
Light is the primary energy source for orchids to photosynthesize and bloom. However, not all light is the same.
Most orchids prefer bright, indirect light. Direct, harsh sunlight can burn their leaves. Signs of insufficient light are dark green leaves and the orchid not blooming. Meanwhile, yellowing leaves or burnt spots indicate excessive light.
For Phalaenopsis, place them near an east-facing window or under 50-70% shade cloth. Dendrobiums and Vandas generally require brighter light; even a little direct morning sun can be beneficial. Observe the leaf color; bright green leaves are an indicator of optimal light.
Proper Watering
This is one of the most commonly misunderstood aspects. Overwatering is the number one cause of orchid death. Orchids are better off slightly underwatered than overwatered.
The golden rule is to water when the growing medium is dry. You can feel it with your finger or lift the pot to gauge its weight. A light pot indicates dry medium. For clear pots, observe the root color; silvery-green roots mean it's time to water, while bright green roots indicate sufficient water.
When watering, do it thoroughly until water drains from the drainage holes. This helps flush out accumulated mineral salts. Use clean water, preferably rainwater or RO (reverse osmosis) water. Avoid tap water that contains high chlorine or hard minerals. Watering frequency can be 1-3 times a week depending on the orchid type, medium, and environmental conditions.
Humidity and Air Circulation
Tropical orchids require high humidity, ideally between 60-80%. An environment that is too dry can cause leaves to wrinkle and flowers to wilt quickly. However, high humidity without good air circulation can trigger the growth of fungi and bacteria.
To increase humidity, you can place pots on a tray filled with pebbles and water (ensure the bottom of the pot is not submerged). Misting can also help, but do it in the morning so the leaves have time to dry before nightfall. Good ventilation, whether from a small fan or natural airflow, is crucial for disease prevention.
Regular Fertilization
Orchids need nutrients, but in very diluted doses. Overly concentrated fertilizer can burn the roots.
Use a specialized orchid fertilizer or a balanced NPK fertilizer (e.g., 20-20-20) diluted to 1/4 or 1/2 strength of the recommended dose. During the vegetative growth phase (leaves and roots), use a balanced fertilizer. To stimulate blooming, switch to a fertilizer with a higher Phosphorus (P) content (e.g., 10-30-20).
Fertilization frequency is generally every 1-2 weeks. Always water the orchid with clean water first before fertilizing to protect the roots. Do not fertilize stressed or sick orchids.
Common Orchid Problems and Solutions: Overcoming Care Challenges
Even if you follow the basic tips, problems can still arise. Recognizing the symptoms and their causes is key to providing the right treatment.
Orchid Not Blooming
This is the most common complaint. Orchids with healthy leaves but reluctant to bloom often experience an imbalance in their conditions.
Causes:
- Insufficient Light: This is the most common cause. Orchids need enough light to gather energy for flower production.
- Unbalanced Fertilization: Too much Nitrogen (N) will promote leaf growth, not flowers.
- Lack of Cool Stress (for certain types): Some orchids, like Dendrobiums, require a period of cooler night temperatures to trigger blooming.
- Immaturity: The orchid is too young to bloom.
Solutions:
- Move to a location with brighter light (but still indirect). Observe leaf color changes.
- Switch to a fertilizer with a higher P content when the orchid appears to have reached a mature and healthy size.
- For Dendrobiums, try placing them in an area with slightly lower night temperatures for a few weeks in autumn.
Yellowing or Brown Leaves
Changes in leaf color are an important indicator of orchid health.
Causes:
- Overwatering: Leaves turn yellow, wilt, and become soft, often accompanied by root rot. This is a danger sign.
- Underwatering: Leaves turn yellow, wrinkle, or wilt and feel dry. Roots are also dry and brittle.
- Too Much Light: Leaves can turn yellow, get sunburned, or develop dry brown spots.
- Nutrient Deficiency: Especially nitrogen, causing older leaves to yellow evenly.
- Fungal/Bacterial Diseases: Spreading yellow or brown spots, often with clear borders.
Solutions:
- Adjust watering schedule according to medium conditions. Let the medium dry out before watering again.
- Move the orchid to a location with appropriate light intensity.
- Fertilize with a balanced fertilizer regularly.
- If there are signs of disease, isolate the plant and use fungicide/bactericide as recommended.
Root Rot
Roots are the heart of an orchid. Rotting roots mean the orchid cannot absorb water and nutrients.
Causes:
- Overwatering: The medium is constantly too wet, causing roots to lack oxygen.
- Medium Too Dense/Decomposed: Old medium no longer provides good aeration and retains too much water.
- Poor Drainage: Pot drainage holes are clogged or the pot is inadequate.
Solutions:
- Repot immediately. Remove the orchid from the pot, clean off all old medium.
- Cut off rotten roots (soft, blackish-brown, smelly) with sterile scissors. Keep healthy roots (firm, greenish-white).
- Replace with fresh, well-draining growing medium. Ensure the pot has adequate drainage holes.
- Reduce watering frequency and allow the medium to dry out completely between waterings.
Pests and Diseases
Pest and disease infestations can weaken orchids and hinder their growth.
Common Pests:
- Mealybugs: Small white cotton-like colonies in leaf axils or under leaves. They suck plant sap.
- Spider Mites: Appear as tiny dots, often leaving fine webbing under leaves. Cause yellowish spots on leaves.
- Snails/Slugs: Feed on young shoots, roots, and flowers, especially at night.
Common Diseases:
- Black Rot: Soft black spots that spread rapidly, caused by fungi. Very deadly.
- Leaf Spot: Brown or black spots on leaves, can be caused by fungi or bacteria.
Solutions:
- Regular inspection is key. Check your orchids at least once a week.
- Isolate infected plants to prevent spread.
- For mealybugs and mites, use an insecticidal soap solution or rubbing alcohol with a cotton swab. For snails, collect them manually or use traps.
- For fungal/bacterial diseases, cut off infected parts with sterile tools and apply fungicide/bactericide. Ensure good air circulation.
Routine and Practical Daily Care: Keeping Orchids in Top Condition
Consistency is key in orchid care. Schedule daily or weekly routines to ensure all their needs are met.
Repotting (Pot and Medium Change)
Repotting is an important process done every 1-2 years, or when the growing medium has decomposed, become compacted, or the orchid has outgrown its pot.
Best Time: After the blooming period has finished and you see new root growth. Avoid repotting when the orchid is blooming or producing flower spikes.
How to Do It:
- Prepare a new pot (slightly larger if needed) and fresh growing medium.
- Gently remove the orchid from its old pot. Clean all old medium from the roots.
- Inspect the roots. Cut off any rotten or dry roots with sterile scissors.
- Place the orchid in the new pot, fill with new growing medium, ensuring it's not too compacted. Let the roots be slightly exposed at the top if that's the orchid's habit.
- Do not water for a few days after repotting to allow the roots to recover from any wounds.
Pruning
Proper pruning can encourage new growth and blooming.
- Dried Flower Stems: After the flowers have wilted and the stem has dried, cut the stem close to the base of the plant. Some orchid types (like Phalaenopsis) can sometimes rebloom from a node on the old stem, so consider cutting above the second or third node if the stem is still green.
- Old or Diseased Leaves: Severely yellowed, diseased, or damaged leaves should be pruned to prevent disease spread and redirect the plant's energy to healthy growth. Use sterile cutting tools.
Environmental Cleanliness
Maintaining cleanliness around orchids is an effective preventive measure against pests and diseases.
- Clean Leaves: Wipe orchid leaves regularly with a damp cloth to remove dust. This aids photosynthesis.
- Remove Withered Leaves and Flowers: Do not let plant debris decay in the pot or around the planting area, as it can become a breeding ground for pests or fungi.
- Keep Tables/Shelves Clean: Ensure the surfaces where orchids are placed are always clean and dry.
Here is a summary table of light and fertilization requirements for popular orchids:
| Orchid Type | Light Requirement | Fertilization Frequency (general) | Fertilizer Type (general) |
|---|---|---|---|
| Phalaenopsis | Bright indirect | Every 2 weeks | Balanced (20-20-20), High P for flowers |
| Dendrobium | Bright-medium, some morning sun | Every 1-2 weeks | Balanced (20-20-20) |
| Vanda | Bright, can tolerate some direct sun | Every week | Balanced (20-20-20), High P for flowers |
Growing orchids indeed requires more attention and understanding than some other ornamental plants. However, with the right guidance and patience, you will find that orchids are very responsive plants to good care. They will repay your hard work with exceptionally beautiful and long-lasting blooms.
Remember that every orchid is an individual. Observe your plants closely, learn their responses to their environment and the care you provide. Don't be afraid to experiment and adjust your routine. With dedication, the beauty of orchids will constantly adorn your home and garden, bringing a calming exotic ambiance. Happy gardening, and may your orchids always bloom perfectly!
Key Takeaways
- Understanding the specific needs of orchids (light, water, medium) is the key to success.
- Pest and disease prevention through sanitation and regular observation is crucial.
- Patience and consistency in care will yield beautiful orchid results.
- Choose orchid types that suit your environmental conditions for a good start.
- Don't be afraid to experiment with different growing mediums and watering methods to find what works best.
Frequently Asked Questions
How often should orchids be watered per week?
Watering frequency depends heavily on the orchid type, growing medium, and environmental conditions. However, the general rule is to water when the growing medium feels dry, not on a fixed schedule. For most epiphytic orchids, this can mean 1-2 times a week, but always check the medium's moisture first.
Why are my orchid leaves turning yellow?
Orchid leaves turning yellow can be caused by several factors, including overwatering, nutrient deficiency, too much direct sunlight, or stress from environmental changes. Check the roots and medium; if the medium is constantly wet and the roots are rotting, it's likely due to overwatering.
When is the best time to repot an orchid?
The best time to repot an orchid is after the blooming period has finished or when you see new root growth. Avoid repotting when the orchid is blooming, as it can cause stress and flower drop. Repotting is usually done every 1-2 years to replace decomposed growing medium.
What type of fertilizer is recommended for orchids to bloom frequently?
To encourage blooming, use a fertilizer with a higher Phosphorus (P) content (e.g., NPK formula 10-30-20 or similar). During the vegetative growth phase, a balanced fertilizer (e.g., 20-20-20) is more suitable. Always follow the recommended dosage on the packaging and water the orchid before fertilizing to avoid root burn.
How can I protect orchids from pest infestations?
Prevention is key. Regularly inspect orchid leaves and stems for signs of pests like mealybugs, spider mites, or snails. If pests are found, immediately isolate the infected plant. Use natural insecticides like neem soap solution or rubbing alcohol for small pests, or appropriate chemical pesticides for more severe infestations. Maintain cleanliness in the growing environment.